Simplex 4100ES-S1 Especificaciones
Busca en linea o descarga Especificaciones para Protección Contra Incendios Simplex 4100ES-S1. Simplex 4100ES-S1 Specifications Manual de usuario
- Pagina / 173
- Tabla de contenidos
- SOLUCIÓN DE PROBLEMAS
- MARCADORES
- Australian 1
- Installation 1
- Copyrights and Trademarks 3
- Approvals 3
- Manufacture 3
- Product / Site 3
- Non-Disclosure Agreement 4
- Document 5
- Amendment Log 5
- …………………………………………………………….7-3 13
- Chapter 1 15
- System Design 16
- 4100ES-S1 Part Codes 17
- 4100 Part Codes (Non-4100ES) 18
- Glossary 19
- Chapter 2 21
- ASSY 566-084 28
- CPU Motherboard 29
- Configuration 29
- Placement 33
- Guidelines 33
- 4100ES Fan Control Module 42
- Installing Other Modules 44
- Chapter 3 45
- Networking 45
- Network Configuration 46
- Getting Started 48
- Step 4. Wiring Network Cards 54
- Chapter 4 62
- SPS Specifications 63
- SPS Adjustments 65
- SPS LED Indications 66
- Troubleshooting an SPS 67
- The Alarm Relay Card 68
- Brigade Interfaces 70
- Chapter 5 72
- SPS Field Wiring (4100ES-S1) 72
- Allocations 74
- Class A NAC 77
- Wiring Table 77
- Powering the 79
- T-GEN 50 79
- 4100U SPS 80
- (4100-9848AU) 80
- SPS Auxiliary Power Wiring 87
- SPS Relay Wiring 89
- IDNet Wiring 90
- SPS IDNet Wiring 91
- Ferrite bead 93
- Chapter 6 94
- Using Install Mode 94
- Chapter 7 98
- PC Software Connections 98
- Software Modes 99
- Software Modes, Continued 100
- Ethernet Service 101
- Port Overview 101
- (0566-719 only) 101
- Serial Service Port 101
- Overview 101
- Chapter 8 102
- Alignment & Adjustment 103
- Maintenance 105
- Appendix A 106
- Card Address DIP Switch 106
- (continued) 107
- Appendix B 108
- Programming Requirements 108
- Appendix C 110
- Checking System Wiring 110
- Continued 111
- Appendix D 112
- Earth Fault Detection 112
- General Guidelines 113
- Access Level 114
- Selection 114
- Starting the Earth 114
- Fault Search 114
- Search Results 117
- Search Results, Continued 118
- Appendix E 120
- Related Documentation 120
- Appendix F 122
- Compatible Actuating Devices 122
- Compatible Detectors, IDNET 125
- Appendix G 128
- 4100ES-S1 Specifications 128
- Appendix H 130
- Appendix I 132
- List of Drawings 132
- TYCO SAFETY PRODUCTS 133
- Products 139
Indice de contenidos
Fire Australian Installation Manual 4100ES-S1 Fire Indicator Panel Installation & Maintenance Australian Installation & Maintenance Manual L
x Format ... 4-9Applications ...
7-3Software Modes, Continued Master Bootloader Interface Mode. This mode is used to download the Master CPU Exec firmware and the CFG.TXT file to
7-4Ethernet Service Port and Serial Service Port The Ethernet service port J1 on the CPU card (0566-719) is used to connect the panel to a local
8-1 {xe "service port"} The 4100ES-S1 is tested in the factory and is loaded with a basic configuration. When the panel arrives on site
8-2 Alignment & Adjustment All the 4100ES-S1 cards and modules in the base panel are tested and aligned in the factory before being supplied
8-3 Power Up & Placing into Operation To place the 4100ES-S1 into operation, perform the following steps: STEP 1 Ensure that the Mains Swi
8-4 Maintenance The 4100ES-S1 system must be kept free from faults and tested on a weekly, monthly and annual basis to verify that it is operatin
A-1 {xe "addresses: setting, for 4100U modules"}{xe "card configuration: address setting"} Addressable cards include a bank of e
A-2 Table A-1. Card Addresses Overview, (continued) Address SW 1-2 SW 1-3 SW 1-4 SW 1-5 SW 1-6 SW 1-7 SW 1-8 Address SW 1-2 SW 1-3 S
B-1 {xe "ULC programming requirements"} This appendix briefly summarises the programming that is required to comply with AS 4428.1. It d
B-2
xi Chapter 6 Using Install Mode ... 6-1Introduction ...
C-1 {xe "wiring: troubleshooting"}{xe "troubleshooting: wiring"}{xe "volt-Ohm meter usage"} This appendix contains ins
C-2Continued on next page Appendix C: Checking System Wiring, Continued Table C-1 lists the correct meter readings for different circuit types. R
D-1 {xe "wiring: Earth Fault Search"}{xe "Earth Fault Search"} This appendix contains instructions on how to use the Earth Faul
D-2 General Guidelines Review the guidelines below before initiating an Earth Fault Search. The Detect Earth Fault jumper must be installed at t
D-3 Earth Fault Searching from the Front Panel This section describes how to conduct an Earth Fault Search, from selecting the appropriate access c
D-4 Earth Fault Searching from the Front Panel, Continued 6. Press the Enter button. The following options become available when you press the N
D-5 Earth Fault Searching from the Front Panel, Continued If you select the IDNet Channel Search menu item, a list of IDNet channels to search bec
D-6 Search Results There are several types of results that can display at the end of an Earth Fault Search. This section covers all types of result
D-7 Search Results, Continued IDNet isolator fault. The message below shows a fault detected after the IDNet isolator was turned on: CARD 2, IDNE
D-8
xii Appendix D Earth Fault Detection ... D-1Overview ... ...
E-1 {xe "documentation set"} The following manuals are relevant to the 4100ES-S1. Book Part Number Title LT0395 4100ES-S1 AS4428 FIP
E-2 Appendix E: Related Documentation, Continued Book Part Number (cont.) Title (cont.) 579-182 4100/4120-Series NIC and Media Modules Installati
F-1 This appendix describes the following: Devices that have been approved as compatible devices for use with the 4100ES-S1. Devices approv
F-2List of Approved Devices, Continued System Sensor Range - Conventional Detectors Detector Type 4100-5001/2/48 Zone Module2190-9156 Monitor ZA
F-3List of Approved Devices, Continued Apollo Range - Conventional Detectors Series 60 Heat detector Type A Series 60 Heat detector Type B
F-4Compatible Detectors, IDNET The following lists the detectors approved for use with IDNet and shows current rating and numbers allowed per loop
F-5Compatible Addressable Field Devices, IDNet The following lists the addressable devices approved for use with IDNet and shows current rating a
F-6
G-1 System Capacity 500 points of addressable devices, plus 500 points of annunciation. Expansion up to 4 x 4100 legacy car
G-2Voltage & Current Ratings of Modules & Assemblies The DC input voltage range of the following modules is 18-33Vdc. The current listed
xiii List of Figures{ XE "List of Figures" } Figure 1-1. Basic 4100ES-S1 System ...
H-1 Part of the system design includes calculating that the quiescent load and the alarm load are each less than the rating of the power supply. N
H-2 Standby Current (A) Alarm Current (A)Module Description Qty each Subtotal each SubtotalFP0934 4100ES-S1 Basic Panel 0.373 0.474100-1288
©2004 Tyco Safety Products Westminster, Westminster, MA 01441-001 USA. Specifications and other information shown were current as of publication, an
²² ²²TYCO SAFETY PRODUCTSCHRISTCHURCH,SafetyProducts+64 3 3895938+64 3 3895096PH:17 MARY MULLER DRIVEP.O. BOX 19545FAX:tycoNEW ZEALAND.LT0316WESTERN
²² ²²TYCO SAFETY PRODUCTSCHRISTCHURCH,SafetyProducts+64 3 3895938+64 3 3895096PH:17 MARY MULLER DRIVEP.O. BOX 19545FAX:tycoNEW ZEALAND.LT0316QUEENSLAN
RL2LL1RL2LL1TYCO SAFETY PRODUCTSNEW ZEALAND.SafetyProducts+64 3 3895938+64 3 3895096PH:17 MARY MULLER DRIVEP.O. BOX 19545FAX:tycoCHRISTCHURCH,4100UWIR
xiv { XE "List of Figures" }List of Tables{ XE "List of Figures" } { XE "List of Tables" } Table 2-1 Master Control
TYCO SAFETY PRODUCTSNEW ZEALAND.SafetyProducts+64 3 3895938+64 3 3895096PH:17 MARY MULLER DRIVEP.O. BOX 19545FAX:tycoCHRISTCHURCH,4100UWIRING DIAGRAM
TYCO SAFETY PRODUCTSNEW ZEALAND.SafetyProducts+64 3 3895938+64 3 3895096PH:17 MARY MULLER DRIVEP.O. BOX 19545FAX:tycoCHRISTCHURCH,4100UWIRING DIAGRAM
TYCO SAFETY PRODUCTSNEW ZEALAND.SafetyProducts+64 3 3895938+64 3 3895096PH:17 MARY MULLER DRIVEP.O. BOX 19545FAX:tycoCHRISTCHURCH,4100UWIRING DIAGRAM
TYCO SAFETY PRODUCTSNEW ZEALAND.SafetyProducts+64 3 3895938+64 3 3895096PH:17 MARY MULLER DRIVEP.O. BOX 19545FAX:tycoCHRISTCHURCH,4100UWIRING DIAGRAM
TYCO SAFETY PRODUCTSNEW ZEALAND.SafetyProducts+64 3 3895938+64 3 3895096PH:17 MARY MULLER DRIVEP.O. BOX 19545FAX:tycoCHRISTCHURCH,4100UWIRING DIAGRAM
TYCO SAFETY PRODUCTSNEW ZEALAND.SafetyProducts+64 3 3895938+64 3 3895096PH:17 MARY MULLER DRIVEP.O. BOX 19545FAX:tycoCHRISTCHURCH,4100UWIRING DIAGRAM
TYCO SAFETY PRODUCTSNEW ZEALAND.SafetyProducts+64 3 3895938+64 3 3895096PH:17 MARY MULLER DRIVEP.O. BOX 19545FAX:tycoCHRISTCHURCH,4100UWIRING DIAGRAM
TYCO SAFETY PRODUCTSNEW ZEALAND.SafetyProducts+64 3 3895938+64 3 3895096PH:17 MARY MULLER DRIVEP.O. BOX 19545FAX:tycoCHRISTCHURCH,4100U(2190-9173) WIR
1-1 The 4100ES-S1 is a compact version of the 4100ES fire alarm, which is intended for use in applications requiring only one or two loops of address
TYCO SAFETY PRODUCTSNEW ZEALAND.SafetyProducts+64 3 3895938+64 3 3895096PH:17 MARY MULLER DRIVEP.O. BOX 19545FAX:tycoCHRISTCHURCH,4100UWIRING DIAGRAM
TYCO SAFETY PRODUCTSNEW ZEALAND.SafetyProducts+64 3 3895938+64 3 3895096PH:17 MARY MULLER DRIVEP.O. BOX 19545FAX:tycoCHRISTCHURCH,4100UA3403 N1976-181
TYCO SAFETY PRODUCTSNEW ZEALAND.SafetyProducts+64 3 3895938+64 3 3895096PH:17 MARY MULLER DRIVEP.O. BOX 19545FAX:tycoCHRISTCHURCH,4100UIDNET RELAY IAM
TYCO SAFETY PRODUCTSNEW ZEALAND.SafetyProducts+64 3 3895938+64 3 3895096PH:17 MARY MULLER DRIVEP.O. BOX 19545FAX:tycoCHRISTCHURCH,4100UWIRING DIAGRAM
TYCO SAFETY PRODUCTSNEW ZEALAND.SafetyProducts+64 3 3895938+64 3 3895096PH:17 MARY MULLER DRIVEP.O. BOX 19545FAX:tycoCHRISTCHURCH,4100U6 POINT SIGNA
TYCO SAFETY PRODUCTSNEW ZEALAND.SafetyProducts+64 3 3895938+64 3 3895096PH:17 MARY MULLER DRIVEP.O. BOX 19545FAX:tycoCHRISTCHURCH,4100UWIRING DIAGRAM
1-2Basic Configuration The basic version of the 4100ES-S1 is used for smaller or single-building applications. It is ideally placed in a small buildi
TYCO SAFETY PRODUCTSNEW ZEALAND.SafetyProducts+64 3 3895938+64 3 3895096PH:17 MARY MULLER DRIVEP.O. BOX 19545FAX:tycoCHRISTCHURCH,4100U24 POINT I/O
TYCO SAFETY PRODUCTSNEW ZEALAND.SafetyProducts+64 3 3895938+64 3 3895096PH:17 MARY MULLER DRIVEP.O. BOX 19545FAX:tycoCHRISTCHURCH,4100UWIRING DIAGRAM
TYCO SAFETY PRODUCTSNEW ZEALAND.SafetyProducts+64 3 3895938+64 3 3895096PH:17 MARY MULLER DRIVEP.O. BOX 19545FAX:tycoCHRISTCHURCH,4100UWIRING DIAGRAM
TYCO SAFETY PRODUCTSNEW ZEALAND.SafetyProducts+64 3 3895938+64 3 3895096PH:17 MARY MULLER DRIVEP.O. BOX 19545FAX:tycoCHRISTCHURCH,4100UWIRING DIAGRAM
TYCO SAFETY PRODUCTSNEW ZEALAND.SafetyProducts+64 3 3895938+64 3 3895096PH:17 MARY MULLER DRIVEP.O. BOX 19545FAX:tycoCHRISTCHURCH,4100ULCD ANNUNCIATO
1-34100ES-S1 Part Codes This section lists the parts that are supported by the 4100ES-S1 Fire Alarm System. The following is a list of assemblies, c
©2004 Tyco Safety Products Westminster, Westminster, MA 01441-001 USA. Specifications and other information shown were current as of publication, an
1-44100ES-S1 Part Code, Continued LB0602 Operator I/F ISO/Test Card LB0605 Fan Control Zone Insert Card 526-873 Slide In Label, LED Swi
1-5Glossary AZF Alarm Zone Facility – means of grouping multiple detectors or devices, and providing common indication and control. Class A Wirin
2-1 This chapter describes how to mount the 4100ES-S1 cabinet to a wall, and how to mount system card bays into the cabinets, modules to bays, etc.
2-2 The 4100ES-S1 cabinet contains the CPU, operator interface, system power supply (SPS), backup batteries, and any additional modules that the pa
2-3 Introduction to 4100ES-S1 Cabinet, Continued The 4100ES CPU motherboard (see Figure 2-1) holds the CPU card, which is central to the 4100ES-S1 s
2-4 Introduction to 4100ES-S1 Cabinet, Continued The CPU card (see Figure 2-2) mounts onto the CPU motherboard. The CPU card contains an Ethernet ser
2-5 Introduction to 4100ES-S1 Cabinet, Continued The CPU card LEDs indicate Bootloader status as shown in Table 2-1. Table 2-1. CPU Card LEDs 1 thr
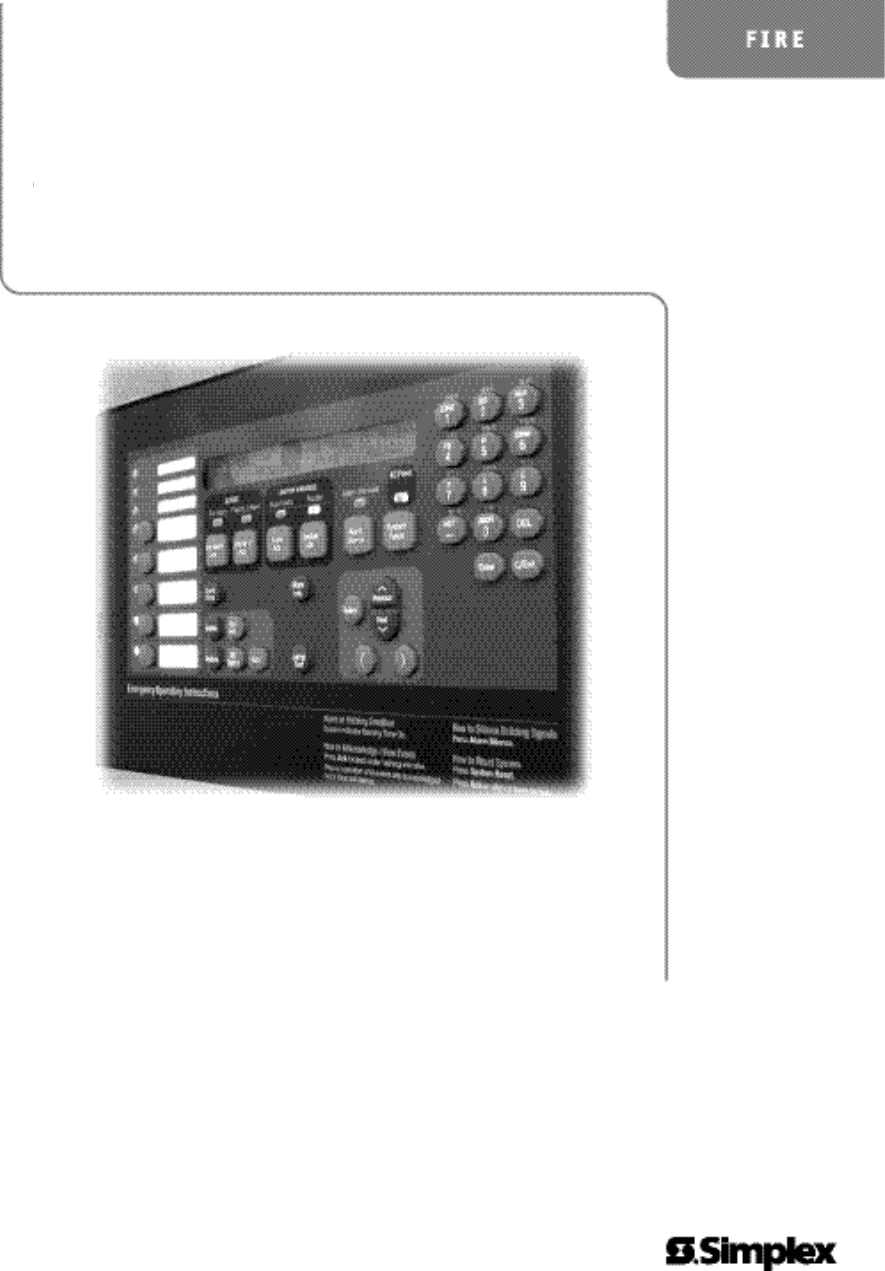
2-6 Introduction to 4100ES-S1 Cabinet, Continued The operator interface (see Figure 2-3) lets a user operate the panel. It provides alarm, fault, and
2-7 Introduction to 4100ES-S1 Cabinet, Continued The basic 4100ES-S1 has a Fuse Distribution Board mounted on the SPS chassis and connected to the Au
2-8 Introduction to 4100ES-S1 Cabinet, Continued In the expansion bay, power and data are distributed via the power distribution interface (PDI). The
2-9 Step 1. Mounting Cabinets The important aspects of mounting the cabinet are: Access for the operator; Height of displays and controls;
iiiCopyrights and Trademarks 2006, 2014 Tyco Australia Pty Limited. All Rights Reserved. All specifications and other information shown were curre
2-10 Step 3. Configuring Cards, Continued Note: Some devices that connect to RUI have inherently grounded shield terminals, in which case 24 C canno
2-11 Step 4. Interconnecting Modules and Bays {xe "4100U: card configuration"} Each card has to be interconnected with every other card in i
2-12 Step 4. Interconnecting Modules and Bays, Continued Panels with legacy motherboards in the expansion bay require some non-PDI connections. If y
2-13 Step 5. Installing Modules into Expansion Bays This section contains guidelines and instructions on installing 4”x 5” cards and traditional moth
2-14 Step 5. Installing Modules into Expansion Bays, Continued Motherboards can be installed on top of the PDI in expansion bays. The data and pow
2-15 Step 5. Installing Modules into Expansion Bays, Continued {xe "mounting: modules to 4100U back boxes"} The power distribution interface
2-16 Step 5. Installing Modules into Expansion Bays, Continued {xe "mounting: motherboards to 4100U back boxes"} Use the following procedure
2-17 Step 6. Installing LED/Switch Modules into Expansion Bays The LED/switch user interface consists of a variety of modules, mounted to the front o
2-18 Step 6. Installing LED/Switch Modules into Expansion Bays, Continued Figire 2-11shows an LED/switch bay from the user’s perspective. Figure
2-19 Step 6. Installing LED/Switch Modules into Expansion Bays, Continued If more than 32 zones are required, a second controller (4100-1289) will be
ivNon-Disclosure Agreement Tyco (THE COMPANY) and the User of this/these document(s) desire to share proprietary technical information concerning e
2-20 Step 6. Installing LED/Switch Modules into Expansion Bays, Continued Refer to Figure 2-14 and the instructions below to mount the LED/switch con
2-21 Step 6. Installing LED/Switch Modules into Expansion Bays, Continued All types of modules are mounted to the front of a bay, and are connected t
2-22 4100ES Fan Control Module {xe "service port: software modes"}{xe "software modes"} The ME0456 is a 4100ES style Switch/LED d
2-23 Figure 2-16. ME0456 Fan Control Module
2-24 Installing Other Modules Detailed installation instructions for these modules can be found in these instruction documents. A copy of the appro
3-1 {xe "Network 4100 Fire Alarm System"} A basic 4100ES-S1 system becomes a network node when a Network Interface Card (NIC) or other comp
3-2Network Configuration Multiple 4100ES-S1 panels can be connected together into a network system by using network interface cards (NICs). When a N
3-3Network Configuration, Continued Network rings or loops can be joined via physical bridge cards. There may be no more than two network loops conn
3-4Getting Started This chapter describes how to turn a basic 4100ES-S1 into a network node. This process consists of the following: Step 1. Mounti
3-5Introduction to the 4100 Network Interface Card (NIC), Continued Figure 3-3. 4100-6014 Network Interface Card {xe "network interface car
vModel Number & Firmware Revision This manual applies to product with the following: Model number : 4100ES-S1 Firmware revision : 1.02.04 an
3-6Introduction to the 4100 Network Interface Card (NIC), Continued There are two media cards that can be plugged into the 4100-6014 NIC: 4100-6
3-7Introduction to the 4100 Network Interface Card (NIC), Continued {xe "wired media card: specifications"}{xe "fiber-optic media card
3-8Step 1. Configuring Network Cards, Continued There are two jumper settings on the NIC card: P3 and P4. P3: Determines the NIC data transmission
3-9Step 2. Mounting Media Cards to the NIC {xe "network interface card (NIC): mounting media cards to"}{xe "modem media card: mounting
3-10Step 4. Wiring Network Cards The nodes in the network now have to be wired together, so that the NIC in one host panel connects to the NIC in th
3-11Step 4. Wiring Network Cards, Continued Maximum wiring distances are shown in Table 3-2. Table 3-2. Wiring Distances Media Type Size Data Rate
3-12Step 4. Wiring Network Cards, Continued Connectors U1 (transmitter) and U2 (receiver) on the 4100-6057 Fiber-Optic Media Card are used to connec
3-13Step 4. Wiring Network Cards, Continued The 4190-9010 Coupler is used with the 4100-6057 Fibre Optic Media Board, revision “C” or higher. Two 41
3-14Step 4. Wiring Network Cards, Continued The illustration below shows coupler wiring.{xe "fiber-optic media card: coupler requirements"
3-15
viCautions, Warnings, and Regulatory Information READ AND SAVE THESE INSTRUCTIONS. Follow the instructions in this installation manual. These inst
3-16Step 4. Wiring Network Cards, Continued Figure 3-8 shows how to connect between two CPU motherboards with wired media network cards. The right
3-17Step 4. Wiring Network Cards, Continued {xe "wiring: fiber-optic media card"}{xe "fiber-optic media card: wiring"}Figure 3-9
4-1 The system power supply (SPS) is described in Chapter 2. A picture of it is shown in Figure 2-4. This chapter has the current and voltage r
4-2SPS Specifications Table 4-1 summarizes the specifications for the SPS.{xe "system power supply (SPS): specifications"} Table 4-1. SPS
4-3SPS Specifications, Continued The bulk supply (rated at 9A max) which feeds 24V Sig, 24V Card, 24V Aux also supplies the SPS Card including th
4-4{xe "system power supply (SPS): configuring "}{xe "remote power supply (RPS): configuring "}{xe "card configuration: syst
4-5SPS LED Indications The SPS has the following LEDs: {xe "system power supply (SPS): LEDs"}{xe "remote power supply (RPS): LEDs&quo
4-6Troubleshooting an SPS {xe "system power supply (SPS): troubleshooting"}{xe "remote power supply (RPS): troubleshooting"}{xe &
4-7The Alarm Relay Card {xe "system power supply (SPS): troubleshooting"}{xe "remote power supply (RPS): troubleshooting"}{xe &qu
4-8The Alarm Relay Card, Continued The relays have one set of voltage-free contacts (see note below) connected to one pair of terminals via a header
vii Table of Contents{ XE "Table of Contents" } Copyrights and Trademarks...
4-9Brigade Interfaces {xe "service port: software modes"}{xe "software modes"} The Alarm Relay Card is typically used to provide
4-10Brigade Interfaces, Continued The ASE or AIU/PPU should be powered from the fused DC distribution board on the power supply. It is recommende
5-1 This chapter shows how various devices are wired to an SPS. It includes connection to NACs, IDNet, relays, and power circuits. Refer to the pa
5-2 All field wires must be 0.75 mm2 or greater cross section and comply with AS 1670.1 and the wiring code. Conductors must test free of all
5-3SPS NAC Field Wiring Guidelines {xe "wiring: distances, Class A (NAC)"}{xe "NACs: wiring distances (Class A)"}{xe "Class
5-4SPS NAC Field Wiring Guidelines, Continued Some or all of these output functions could be implemented using addressable devices or other relay mo
5-5SPS NAC Field Wiring Guidelines, Continued {xe "wiring: Class B (NAC)"}{xe "Class B wiring: NACs"}{xe "NACs: wiring (Cla
5-6Power Supply Wiring Distances {xe "wiring: distances, Class A (NAC)"}{xe "NACs: wiring distances (Class A)"}{xe "Class A
5-7Power Supply Wiring Distances, Continued {xe "wiring: distances, Class B (NAC)"}{xe "NACs: wiring distances (Class B)"}{xe &qu
5-8Using T-GEN 50 with 4100ES-S1 AS 1670.1 requires fire alarm warning systems to produce sounds complying with ISO 8201. One way of meeting this
viii Step 1. Mounting Cabinets ... 2-9Overview ...
5-9Using T-GEN 50 with 4100ES-S1, Continued 24V IN+-+-+-+-+-+-+-+-F4 F1F3 F2B+ B-A+ A-NAC1B+ B-A+ A-NAC2B+ B-A+ A-NAC3B+A-IDnetSHLDA+4100U SPS(4100-
5-10Using T-GEN 50 with 4100ES-S1, Continued Connector block mounted on bracketFBCOMNOFBT-GEN 5010 k ohm resistorLINE -LINE +EARTHDC INPUT+24V+24V
5-11Using T-GEN 50 with 4100ES-S1, Continued Table 5-3 shows the switch and link settings for T-GEN 50 software version 1.7 when controlled from a
5-12Using T-GEN 50 with 4100ES-S1, Continued A T-GEN 50 can be controlled and supervised using a NAC output. The NAC is used to control the ALM-
5-13Using T-GEN 50 with 4100ES-S1, Continued Table 5-4 shows the switch and link settings for T-GEN 50 software version 1.7 when controlling from
5-14Using T-GEN 50 with 4100ES-S1, Continued An optional three-position control ME0460 (see part numbers in Chapter 1) allows the T-GEN 50 to be s
5-15Using T-GEN 50 with 4100ES-S1, Continued Refer to the T-GEN 50 Installation and Operating Guide (LT0186) for details about the wiring of speak
5-16SPS Auxiliary Power Wiring The panel, battery-backed, unregulated dc bulk power is available from the SPS via the NAC and the 24V Aux power term
5-17SPS Auxiliary Power Wiring, Continued {xe "auxiliary power: isolators and"}{xe "IDNet power isolator"}{xe "isolators&quo
5-18SPS Relay Wiring {xe "wiring: SPS auxiliary relay"}{xe "system power supply (SPS): wiring, auxiliary relay"}{xe "wiring:
ix NIC Media Cards ... 3-6Requirements and Limitation
5-19SPS IDNet Wiring {xe "guidelines for wiring: IDNet"}{xe "IDNet: guidelines for wiring"}{xe "wiring: guidelines (IDNet)&q
5-20SPS IDNet Wiring , Continued 1. The current allowance per device on the loop is 0.5mA with the LED off, 2mA with the LED on. A maximum of 2
5-21SPS IDNet Wiring , Continued To connect addressable devices/detectors to the SPS IDNet using Class A wiring, read the following instructions. 1
5-22SPS IDNet Wiring , Continued {xe "wiring: Class B (IDNet)"}{xe "Class B wiring: IDNet"}{xe "IDNet: wiring (Class B)"
6-1 Install Mode is a 4100ES facility which is useful during panel installation. While a 4100ES panel is being installed and commissioned, there wi
6-2 Devices can be added individually to the Install Mode list. NOTE: this requires being logged in at Level 3. Refer to the Operator Manual, if
6-3 To view the devices and other contents currently in Install Mode: 1. Press the <Menu> key. 2. Use the Next/Previous arrows to step thr
6-4
7-1 {xe "service port"} The service port on the door with the Operator Interface enables the 4100ES-S1 to connect to a PC running importan
7-2Software Modes {xe "service port: software modes"}{xe "software modes"} The 4100ES-S1 can connect to a PC running important
Mas documentos para Protección Contra Incendios Simplex 4100ES-S1


Relacionado con productos y manuales para Protección Contra Incendios Simplex 4100ES-S1
 (18 paginas)
© 2020, manymanuals.es. Todos los derechos reservados | 0.031 s |
 Manymanuals.com
 Manymanuals.de
 Manymanuals.fr
 Manymanuals.it
 Manymanuals.pl
 Manymanuals.cz
 Manymanuals.es
 Manymanuals-pt.com
Comentarios a estos manuales